ScuzzBlog: Diaries July 2017
Entry 4th July 2017: Post: 1
Amiga Disk Packs and the 1060 Sidecar
Hi
Following my successes with the Amiga 1060 and finally getting the beast
to work I clocked that once I had a set of working disks and
destructions I should make a note of these for future reference. So
today when I booted the GVP Turbo on the 500Plus and got a slight niggle
with the hard drive I decided to create what I am lovingly calling my
Disk Pack Collection which are specially created disks all colour coded
and numbered and housed in a CD size plastic sleeves with sticky labels
and full instructions.
DISK PACK 1: Parnet
This was done to allow me set up easy a Parnet connection with an Amiga
that otherwise did not have the software:
Disks include:
Disk 1: Main Archive : Add the following to the target machine:
c [ drawer ] NETPATCH - netpnet-server - NetSTAT - PNetKeys
I also throw in MOUNT and SHOW
Workbench [ drawer ] node.r info
Workbench [ drawer ] add parnet [ drawer ] with general Parnet software
Parnet Drawer [ software ]- Boot.Client - Boot.Host - CDTV.NetKeys -
DefSysDisk = Monitor.Net - Run.NetKeys
Work [ drawer ] node.r info
Also add node.r info to any other partitions / volumes you wish to share
over the Parnet
Devs [ drawer ] MountList.Parnet.Client - MountList.Parnet.Host -
MountList.Parnet.Mouse - parnet.device
Also throw in narrator.device if not there
L [ drawer ] netpnet.handler
S [ drawer ] ParNET-DriveList
Also keep a copy of various startups and user-startups for reference ONLY.
EDIT: Note
Edit the Parnet-DriveList and uncomment out all the drives you want to
use. Use CED to do this
ie CD NET:DH0
CD NET:DH1
CD NET:Workbench
[ To uncomment simply remove the semi-colon before and after drive plus
any text comments. ]
These are the drives that will be active on this machine and seen by the
other across the Parnet.
Disk 2: Customised Parnet installation of for the A2000
Disk 3: DOpusIV
All in easy to understand drawers and set so they can be copied plus the
respective config files. Given that I set up all my drawers in the same
way menus will all work along with customised buttons.
Disk 4: Original Parnet Software
Disk 5: CED [ Text Editor ]
Disk 6: SysInfo and SnoopDOS
Just add a cable and you are on your way. I just copy the contents of
the drawers to the new / existing drawers on the target machine. Fire up
CED to edit the DriveList and then click the Host and Client on the
connected machines.
I then set up a network connection using DOPus so it works from the
button and then copy as I am now the entire contents of both drives to
my beloved A4000d. I then unplug the Parnet and connect to my 1200 and
place the contents on a ZIP disk for storage. That way I always have two
copies of everything to fall back on.
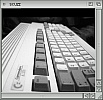
DISK PACK 2: Amiga 1060 Sidecar
I did the same pretty much with the Amiga 1060 as I created copies of my
1.2 Kickstart and 1.2 Workbench customised to run the A1060 Sidecar.
Notes on the plastic sleeve explain how to boot and what to expect plus
the use of the 3.01 and or the 3.02 DOS Startup and Operations 5.25" disks.
*I got the sidecar working*.. This is what you do.
01: Download from link the files that are needed for the 1060.
Copies are available from the Amiga Resource Site of hardware
02: Take the ADF file which on my computer reads*A1060~1.ADF* from a /PC
Formatted disk/ and use ADFBlitzer or what ever you use to create a DD
floppy disk. /I normally copy files to RAM from a PC disk using DOpus./
03: The disk that you create will be labelled *A1060 WB 1.2D*.
04: *CHANGE* the label of that disk to *Workbench 1.2*
Don't forget that there is a *space* between '*h and 1.2*'
05: Connect the Sidecar and the power supply to the back of the Amiga
1000.*Make sure the Amiga 1000 is switched on before you power up the 1060*.
06: Switch on the 1060
07: Insert the *1.2 Kickstart disk* when requested.
08: When you are asked for the Workbench disk use the disk you just
labelled *Workbench 1.2*
/During the boot sequence you should hear a sound like an old phone
ringing and the screen will show Sidecar Workbench V1.2/
09: When you have booted into Workbench Screen you will see the
*Workbench 1.2* icon.
10: Click this and open the *PC drawer* and click the *PC **Mono* icon.
During boot the 1060 gives out a high pitched beep as it tries to access
the 5.25" disk. It is then it asks for the date and the time.
15: *YOU DO NEED MS DOS* in the 1060 on a floppy disk or you will get an
error message. I used *MS DOS 3.10 Start-up Disk(Com)*.
16: Input Date and Time and you will be given the A> prompt
/DIR gave/
*Volume in Drive A is DOS STARTUP**
**Directory of A:\ COMMAND COM 22773 11-04-85*
Remember that 3.01 STARTUP is just the Command Com executable. To get more
functionality you require say 3.02 STARTUP and OPERATING [ two disks ]
These have the other functions ie Format, Copy etc. [ disks need to be
360K format ]
And so disks and instructions are safely placed in their special sleeved
plastic holder with the instructions as given here so that when I have
to do any of these tasks again I have the respective, disks, files,
drawers and guides. So no more scrabbling around trying to remember how
to use the 1060 or create a Parnet connection.
Happens.
scuzz
|