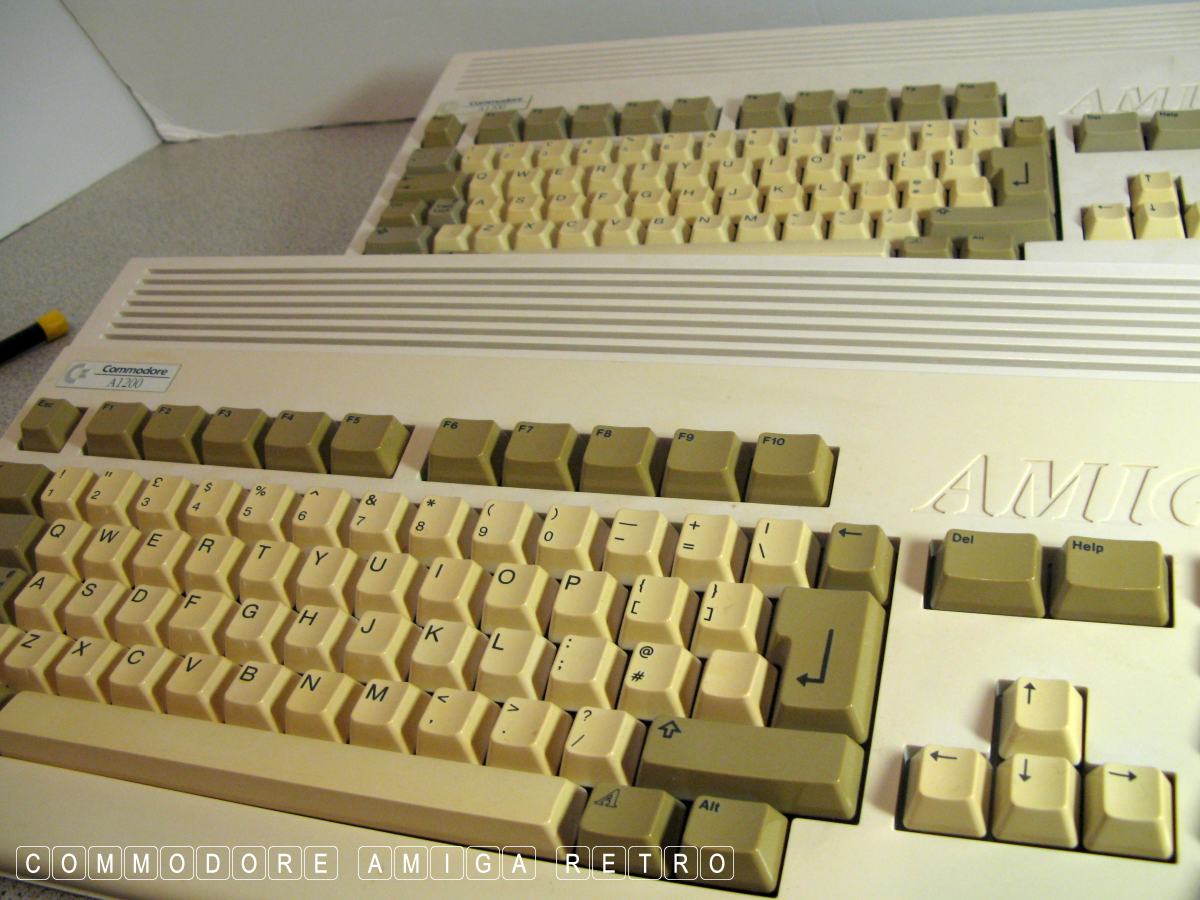
A1200 a strange case
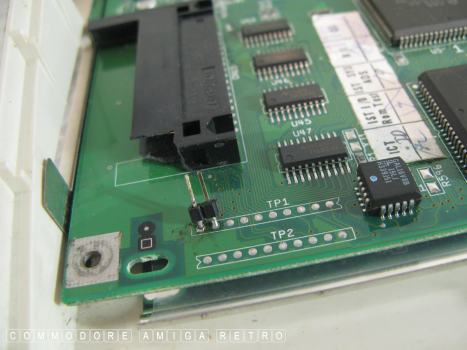
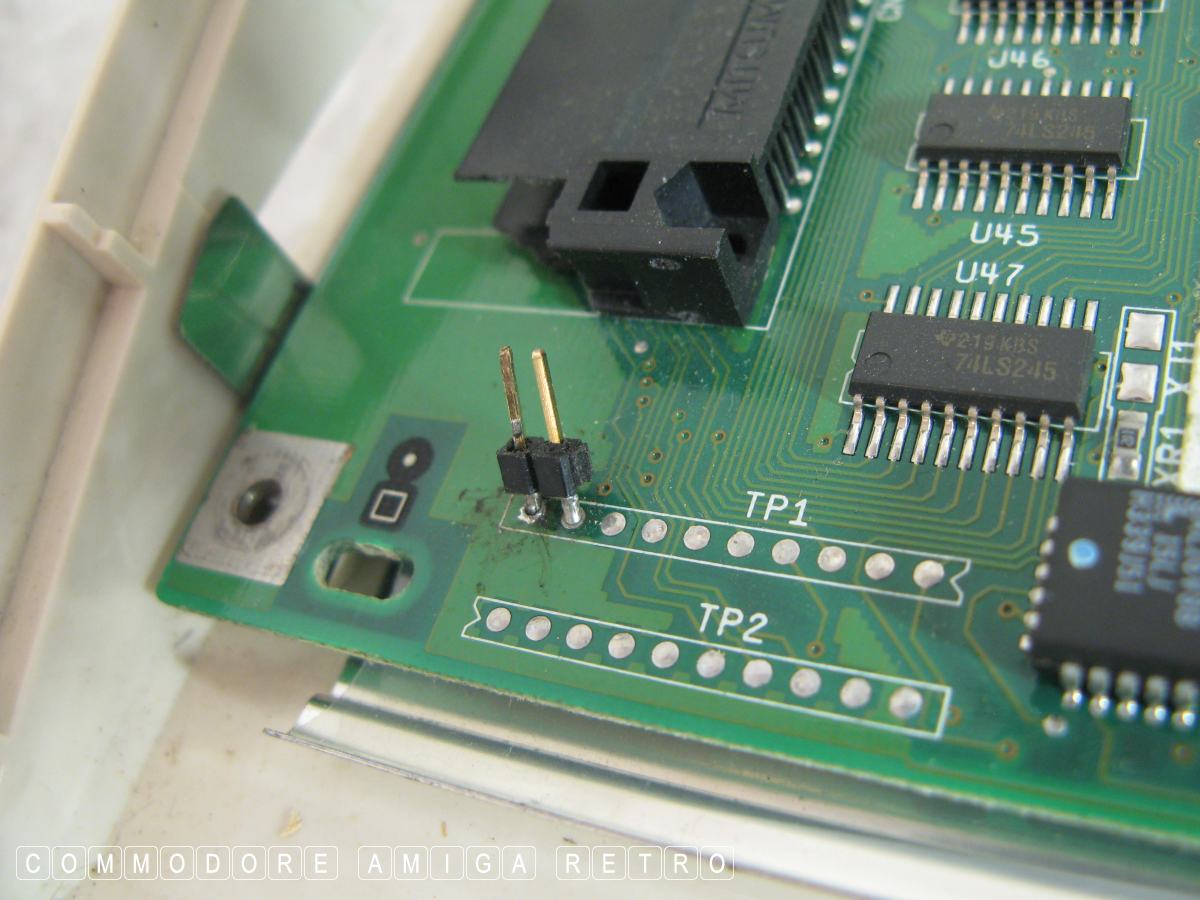
For some reason this motherboard has a
jumper fitted to TP1.

Innocent and not a problem in itself
you would think but ...

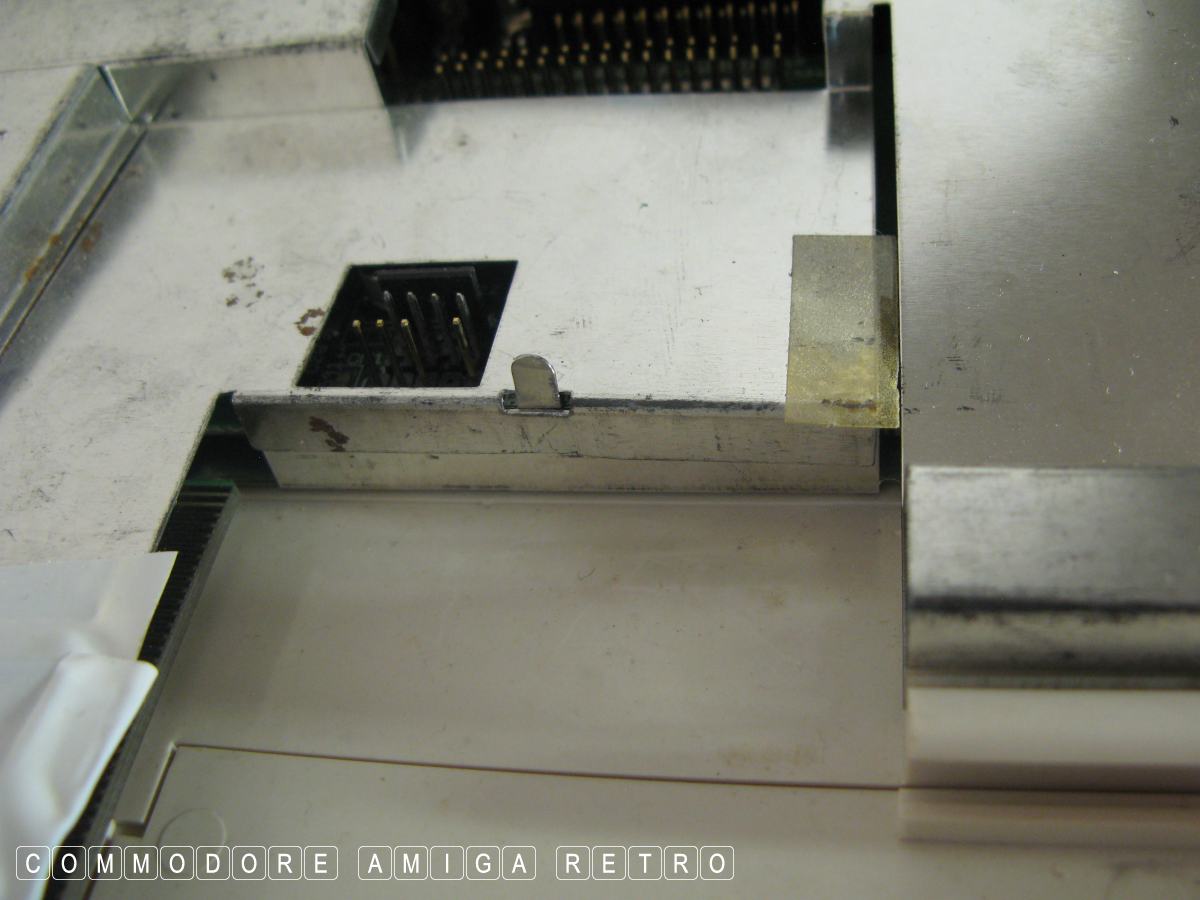
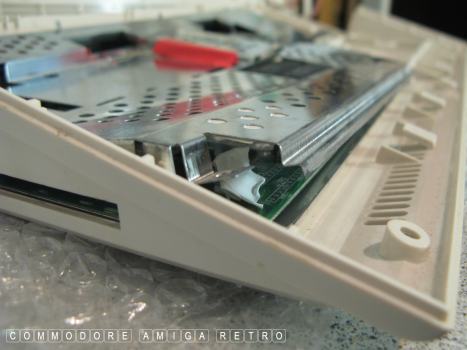
The pin shorts out on the shielding
and causes the computer to lock up.
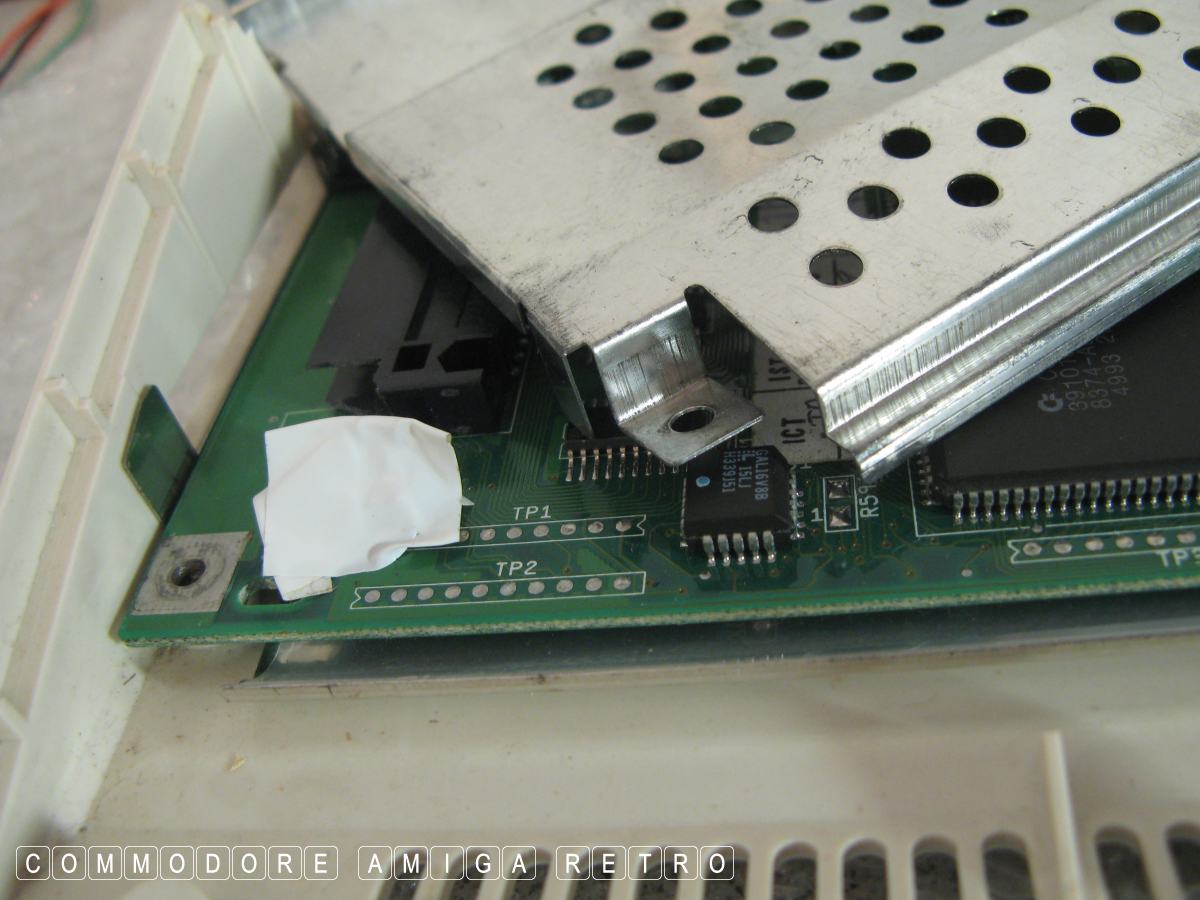
So time to fit some insulating tape
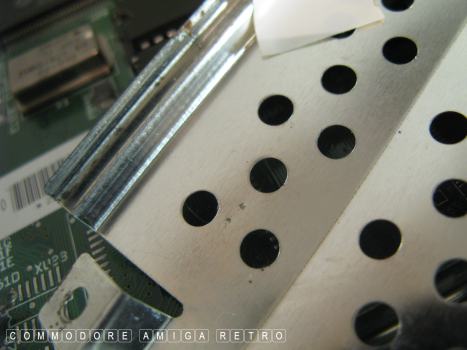
You can see where the jumper has been
touching the shielding from the two
marks on the base of the shielding

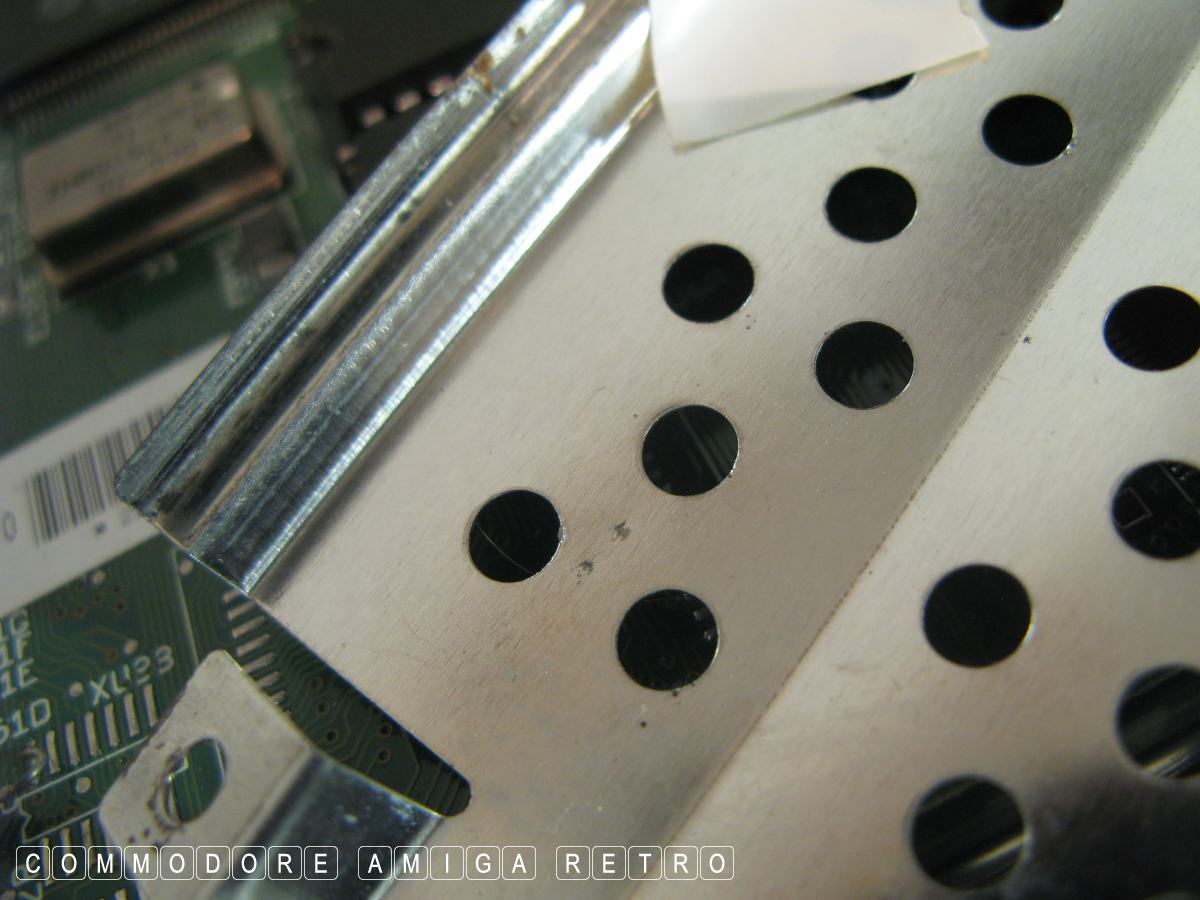
More insulating tape needed.
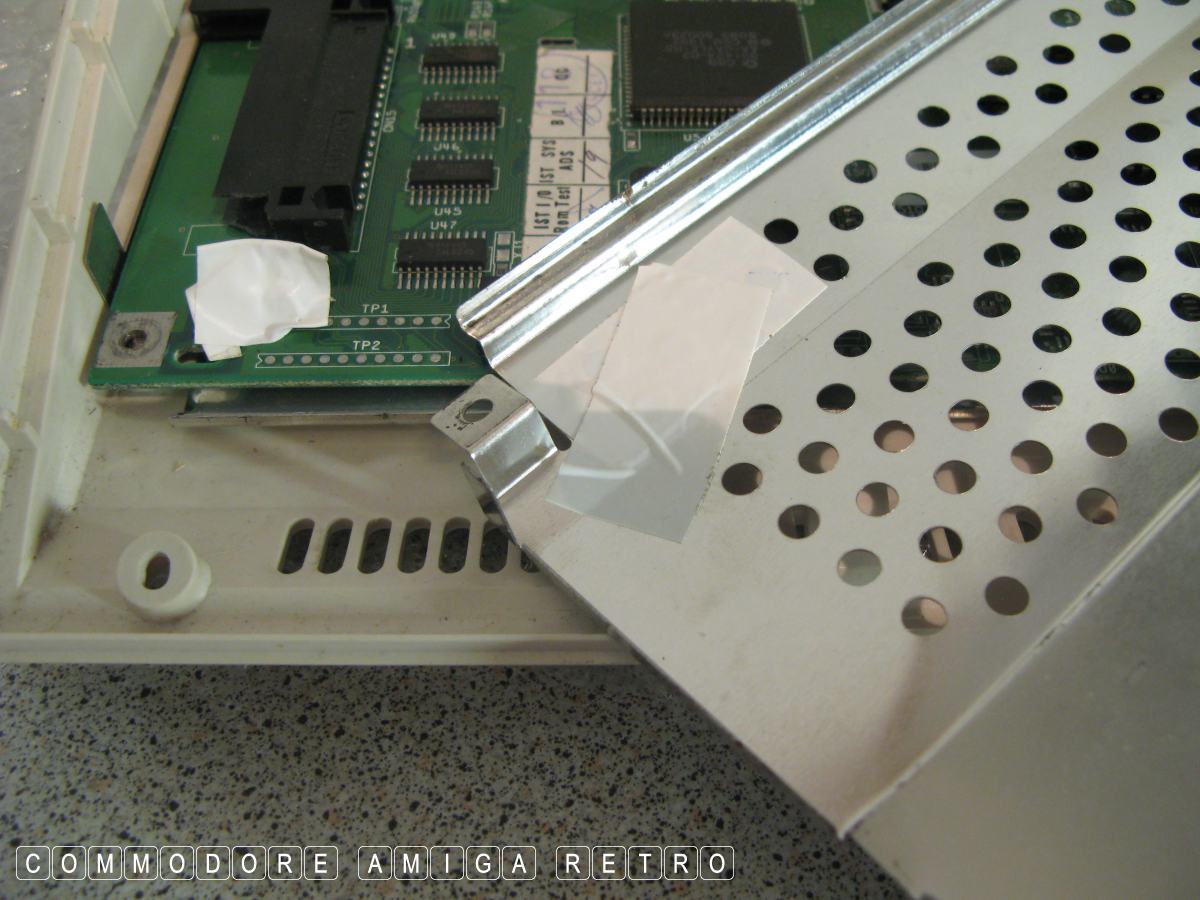
That corner screw to the motherboard has
to be left off to avoid conflicting with
the jumper. No idea what it is there for
but I do recall I had the Apollo 060 fitted
to this computer and was forever getting
power outs which I eventually tracked to this
pin. Once resolved all was fine
Problem with the Apollo is that it needs setting
up with the library and that set-up was lost when
the hard drive fell over so I pulled the 060 and
put it away safely.

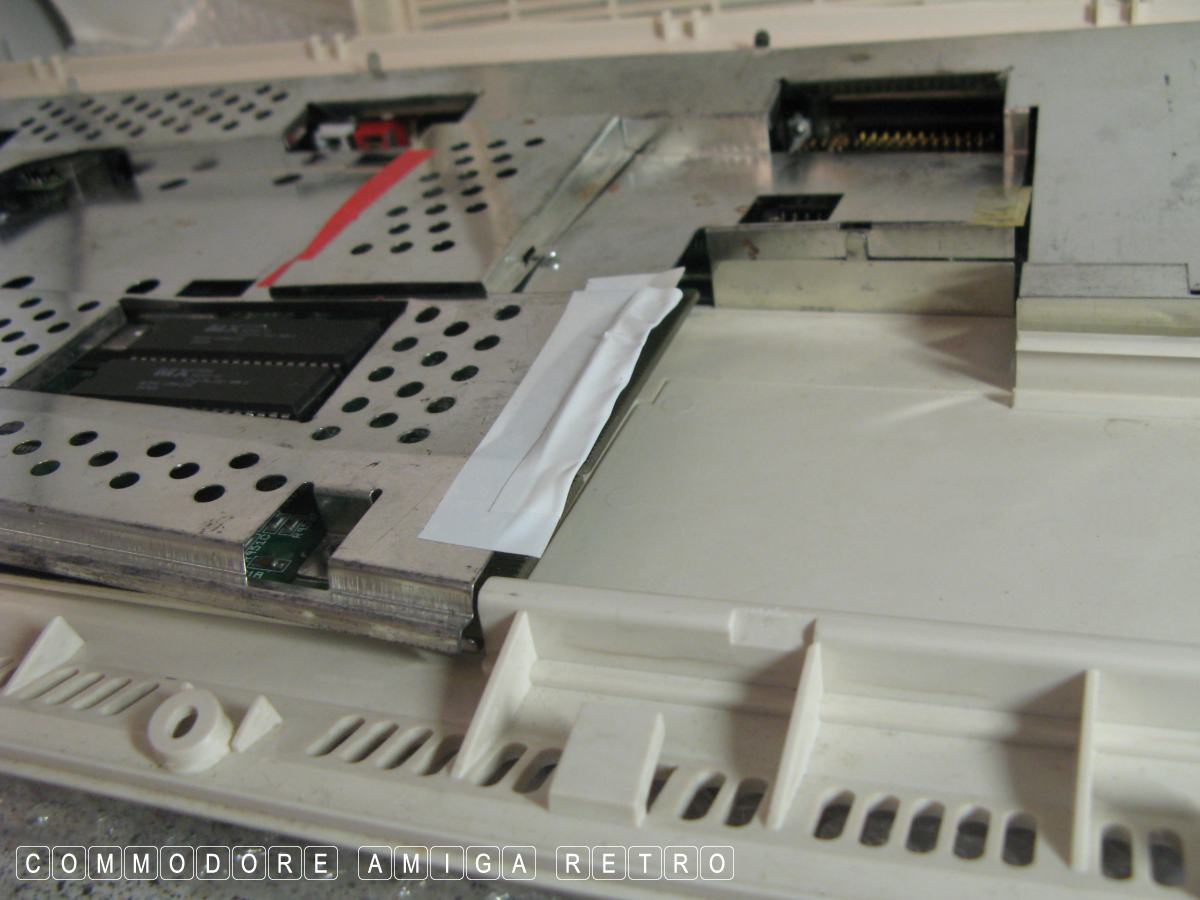
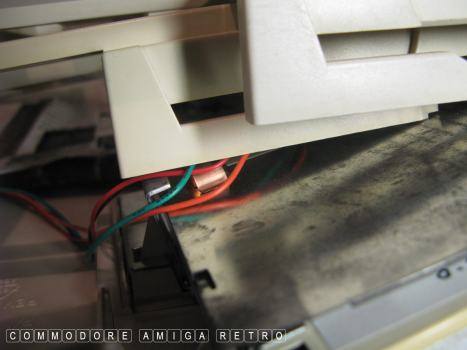
As a precaution I also stick some tape to
the shielding above the trap door pins to
stop any conflict with the RAM card as the
metal is a little worse for wear.
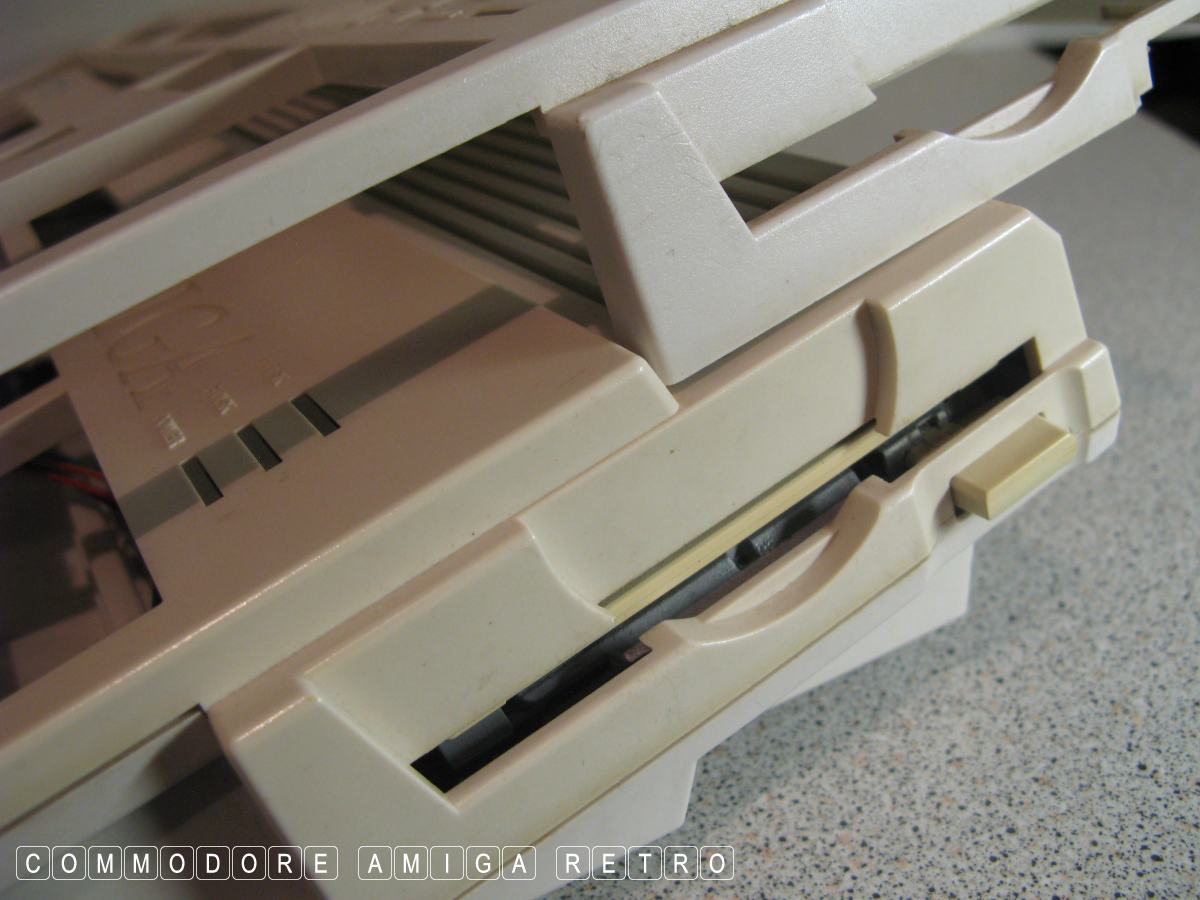
With the new case the floppy works without
any problem what so ever.

Still intrigued what the issue was.
Then I noticed on the old case the bottom
plastic section to the slot is deeper. Maybe
there has always been an issue with the case

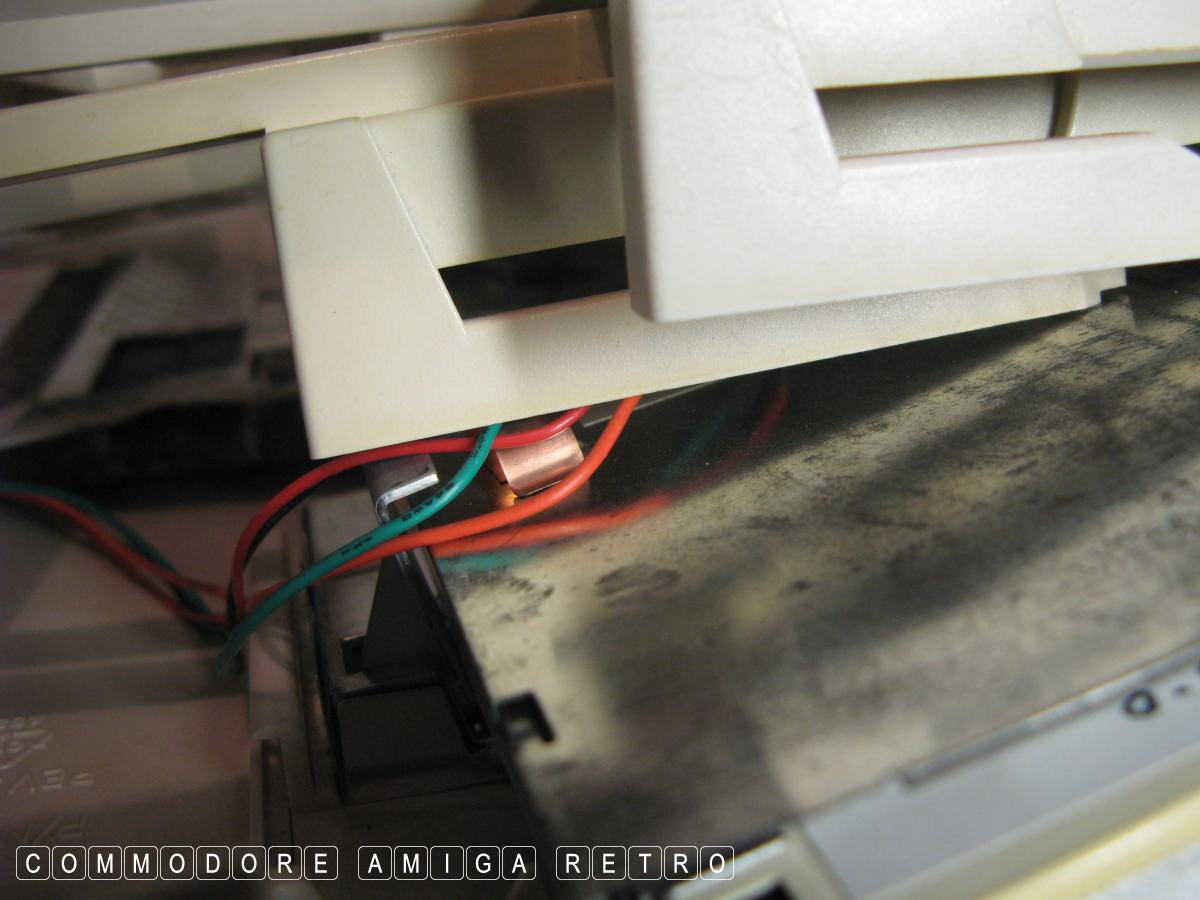
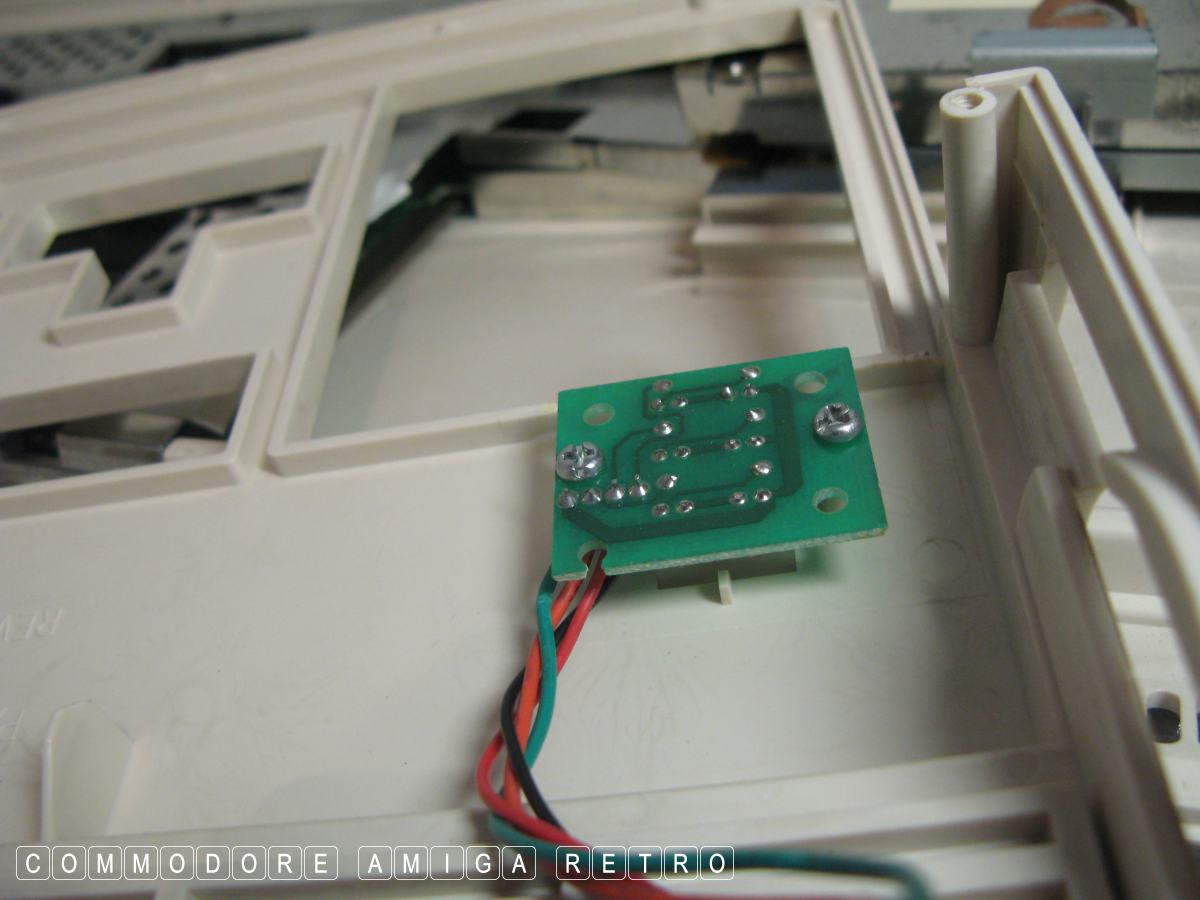
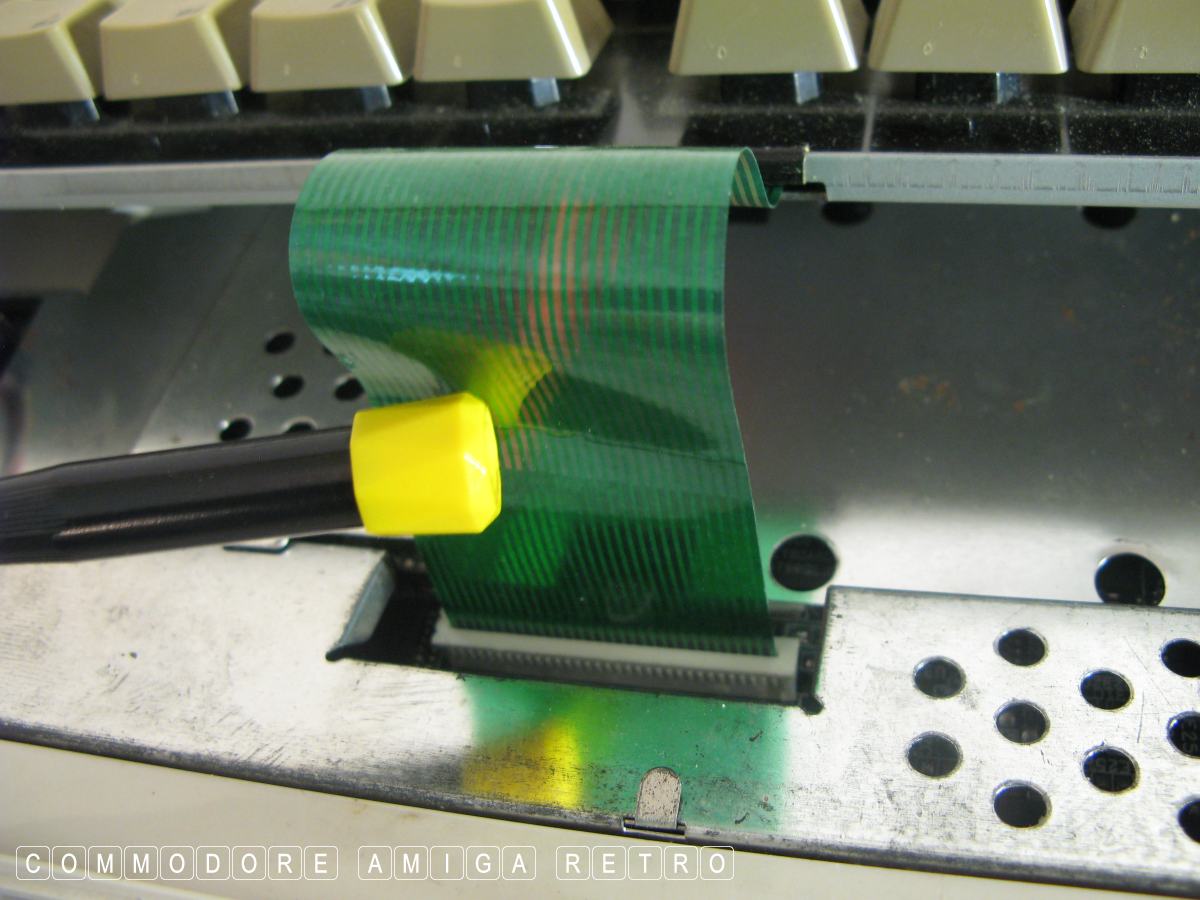
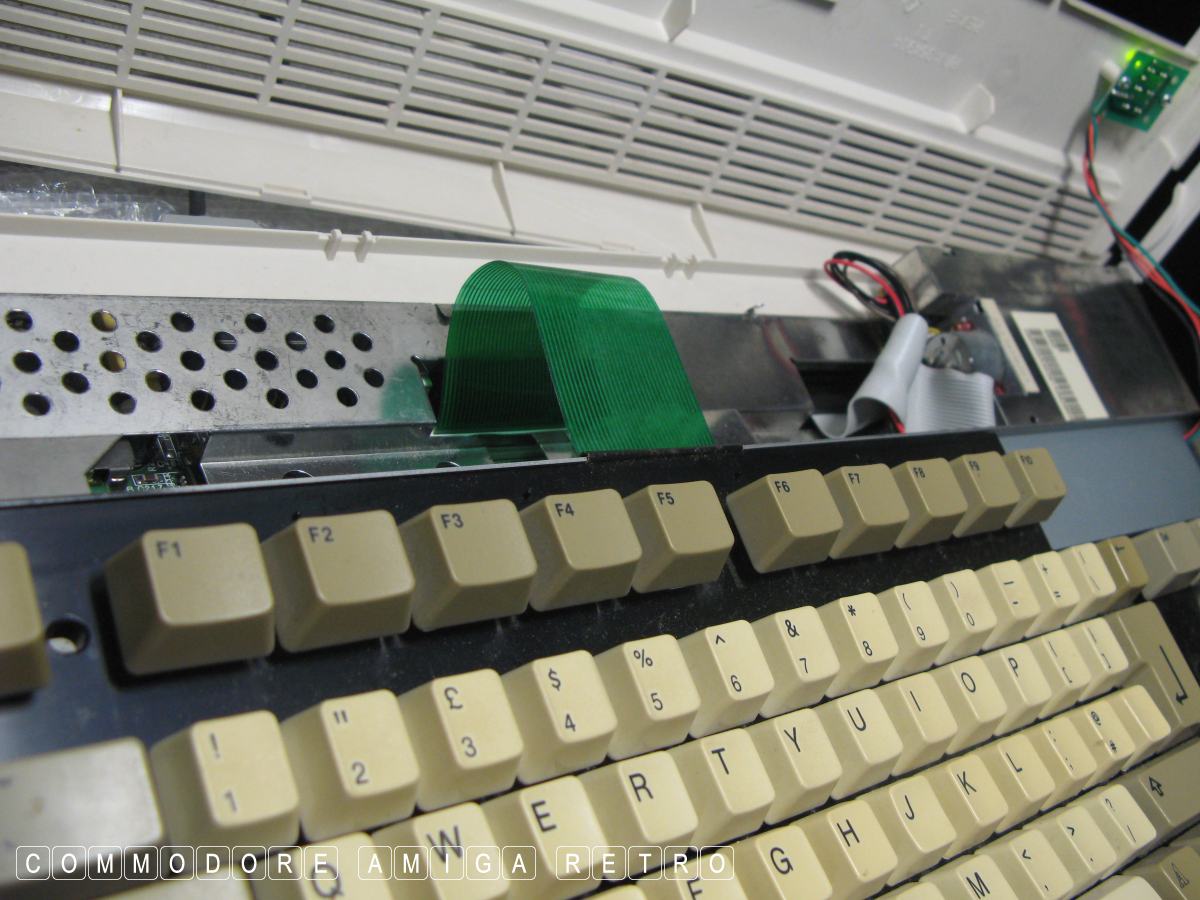
All done so I carefully moved over the
drive light interface.

I refitted the shielding and carefully
bent over all those nasty metal tangs.
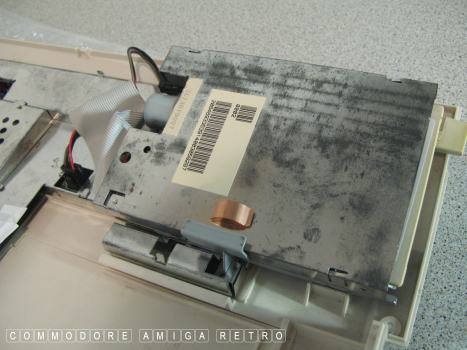
I screwed the floppy drive back into position.
The bracket was fitted to the original position.
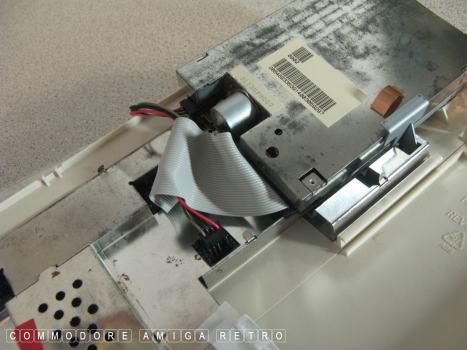
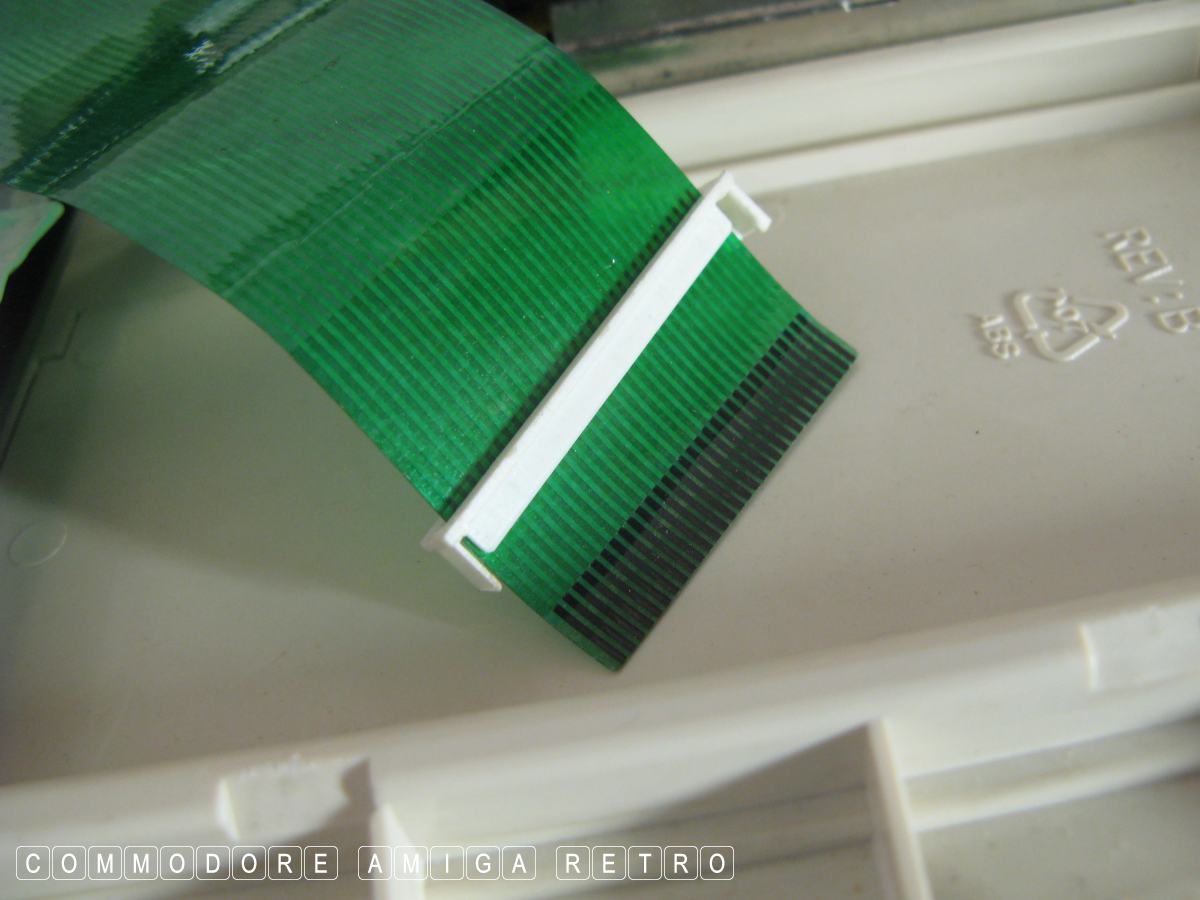
I then reconnected the ribbons.

I managed to balls up the ribbon connector.
Trust me this just aint gonna work.

There was a faint crease I noticed in the ribbon.
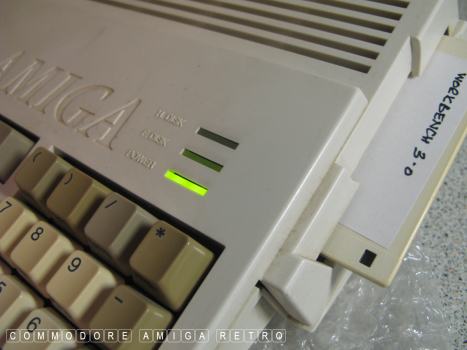
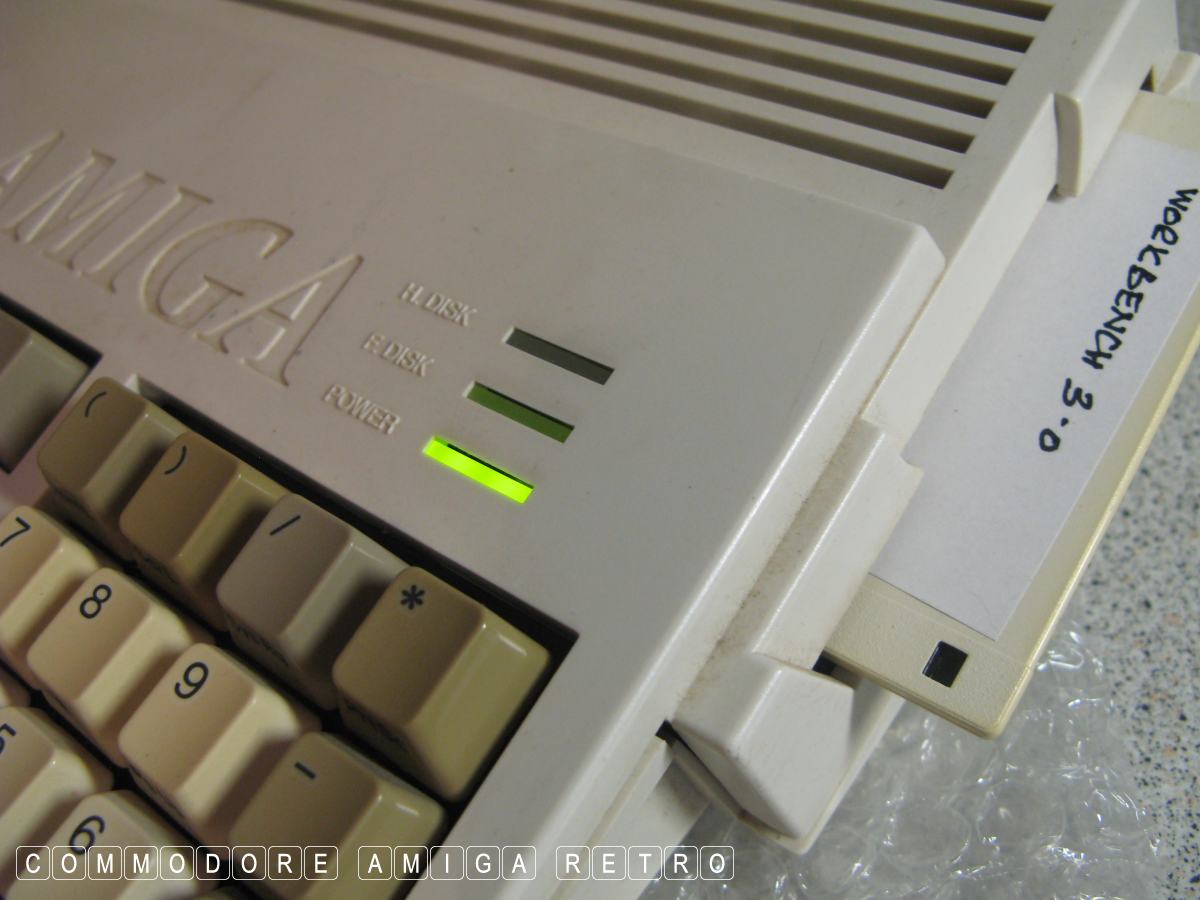
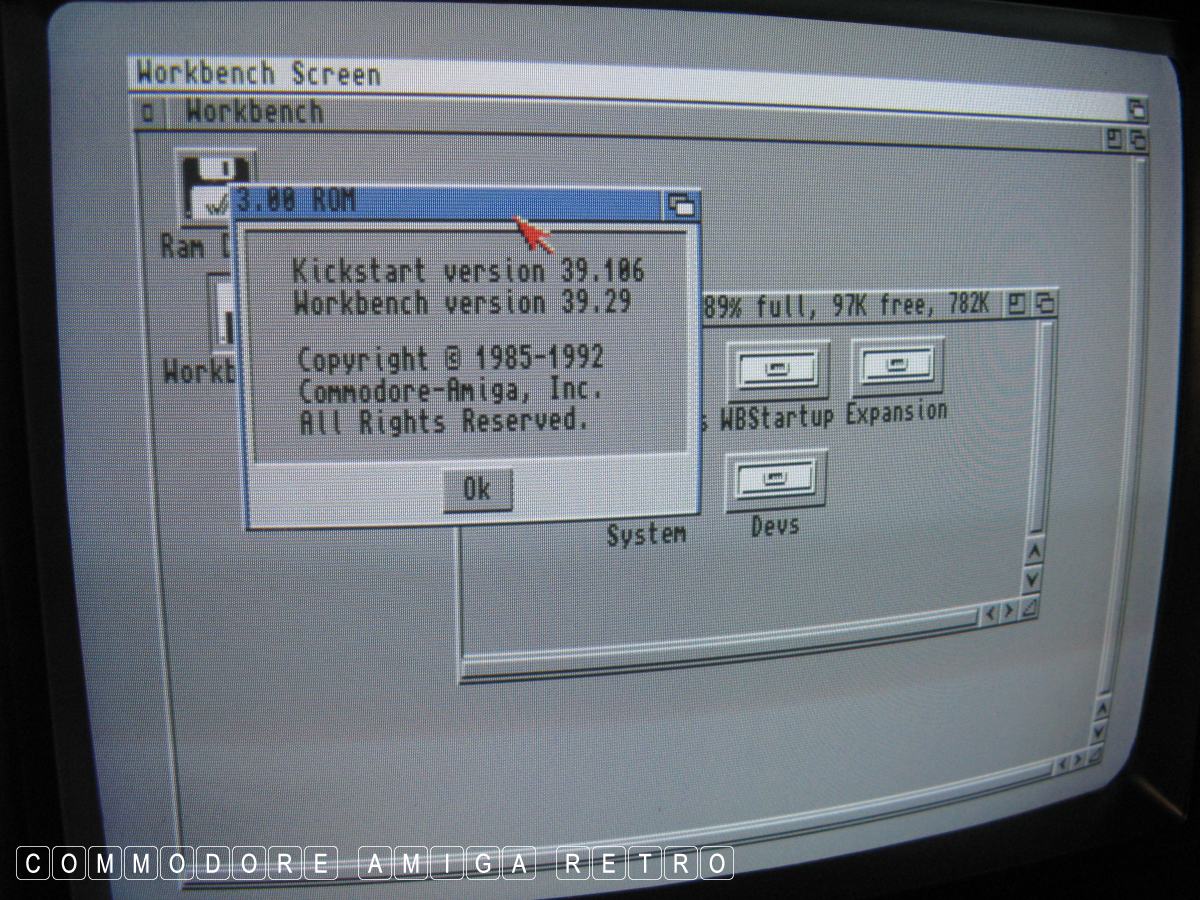
Time to check that the A1200 is working.
Including the floppy drive.. Whoo Hooo !!.
I always finish up with loads more bits
and pieces than I started with.

I've never like ever thrown anything away.
You just really never know when it is going
to come in useful.
OK floppy working and now for the hard drive.
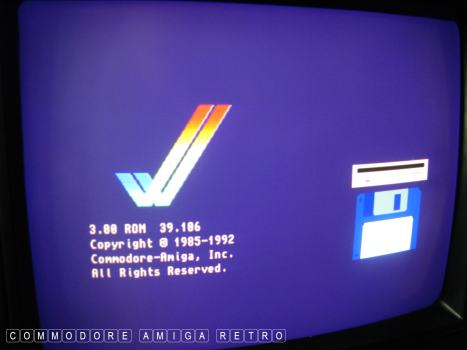
The computer fires up the 3.0 disk requester.
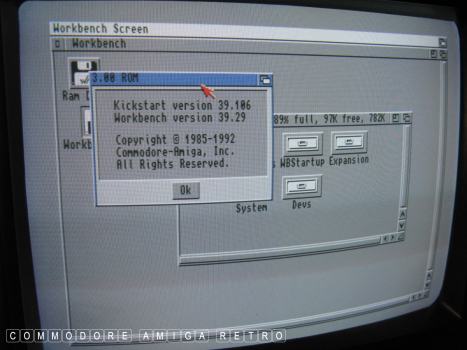
And we are into the operating system using
the Workbench 3.0 floppy disk.
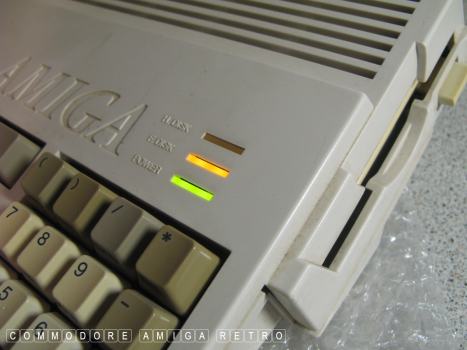
Sadly no keyboard... Oh no. Must be a capacitor
issue... !! Damn

Or it could be that I simply put the white
plastic clip on the wrong way round.. Duh
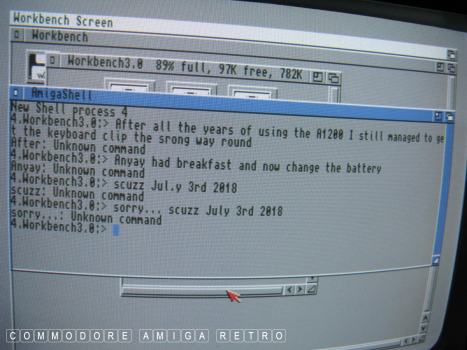
Sorry for the garbled English and spolling
mostakes. I cannot see the monitor from the
the keyboard with the case open.
Suffice to say the keyboard is working OK

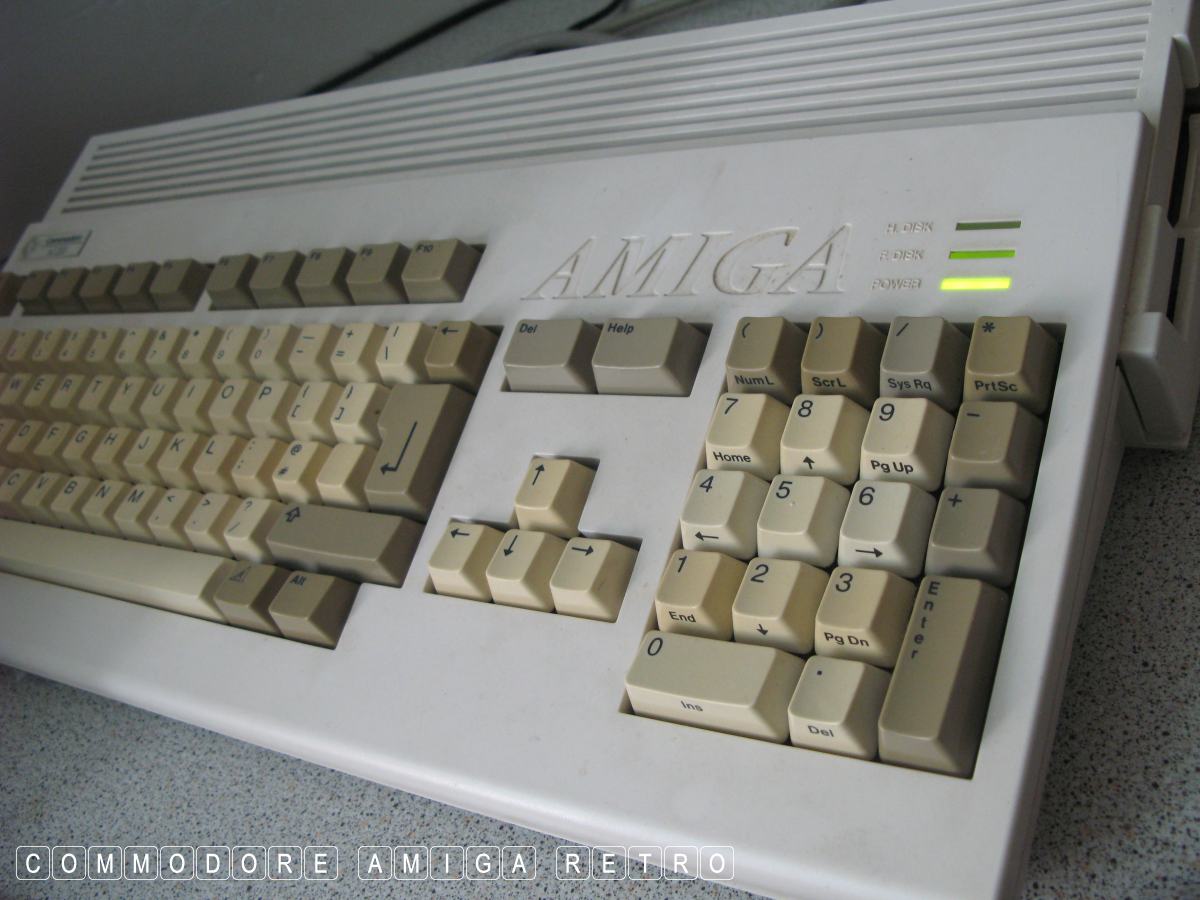
So we have a base Amiga 1200 working fine
and the floppy drive is functioning properly
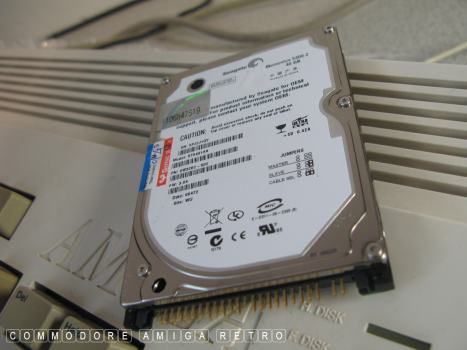
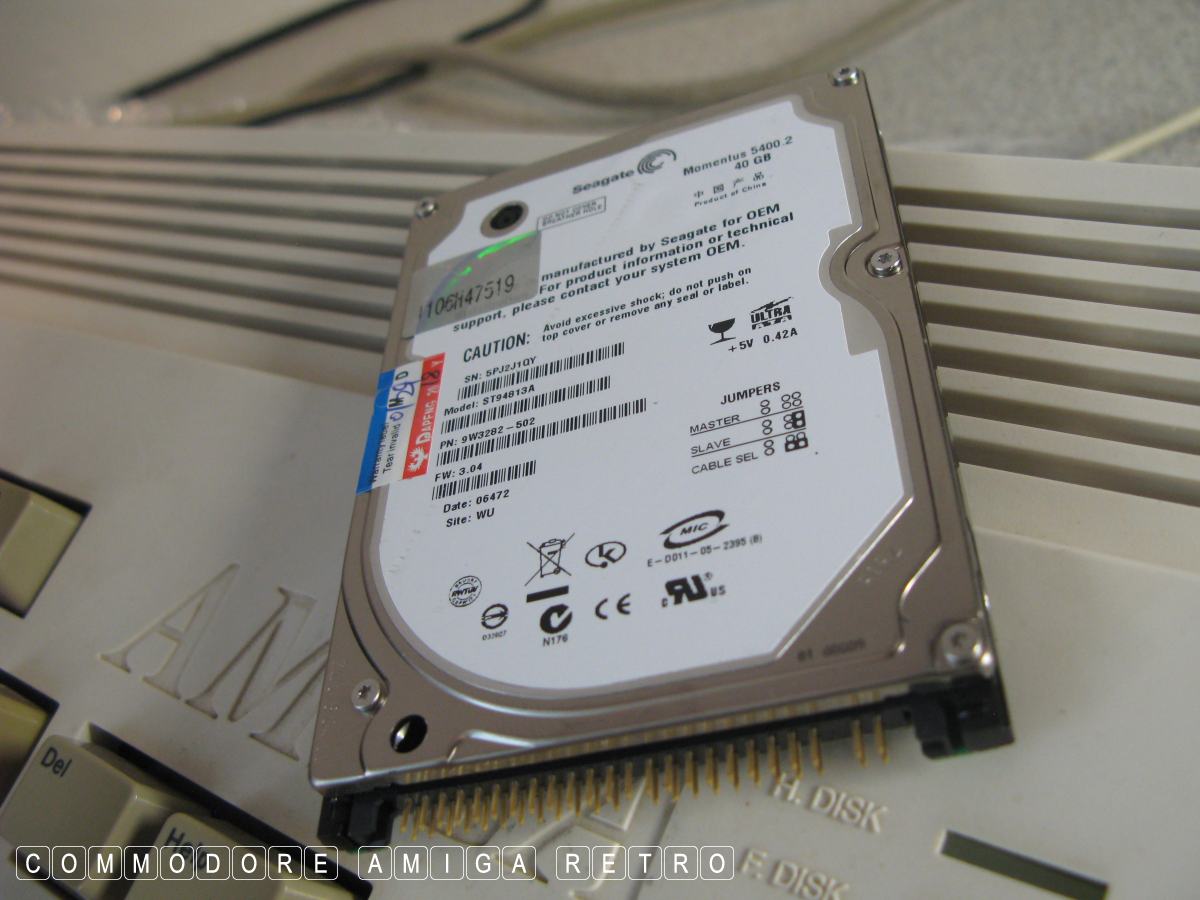
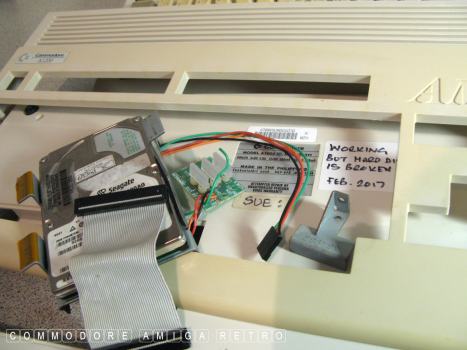
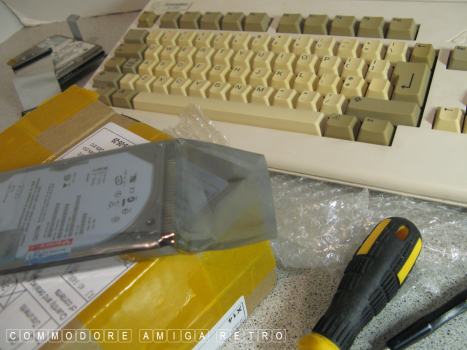
Time now to take the 40GB 2.5" hard drive
that is way way too big in capacity for the
humble Workbench 3.0 to see. Sadly you cannot
get 2.1GB and less hard drives any-more. And even
relatively small drives are becoming rare. This
drive cost me �5 last week and came from China
Irrespective to any view to the different you
really only need 500MB tops for the Workbench
and around 2.1GB each for say two other volumes
and that really is a luxury. My first drive was
80MB for my Desktop Dynamite pack. I upgraded to
a 350MB. And the 550MB that I then further upgraded
is still running the OS on my beloved Amiga 1200 from
1993. She also has fitted two 2.1GB external SCSI
and trust me I have never filled the drives up.
For the most part I keep all my Workbench volumes
under 100MB so I can save to one ZIP disk. Remember
that the OS comes on six DD 850K floppy disks so
just do the maths yourself. Amiga hard drives do not
need to be big.
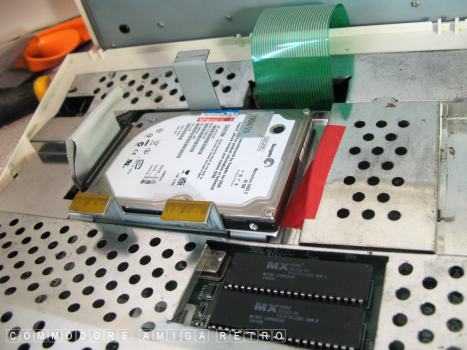
I am unable to screw the drive down into
the cradle. Seems to be pretty stable. I may
take a look later at a fixing method. It matters
not that it's loose. I put a bit of paper under
the hd to isolate the metal from the cradle.
Remember pin 1 to pin 1 or bottom red ribbon
edge to bottom pin. Difficult to get that wrong.
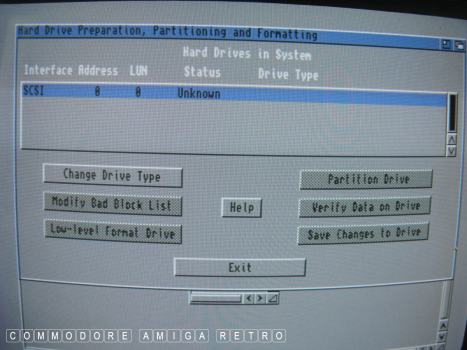
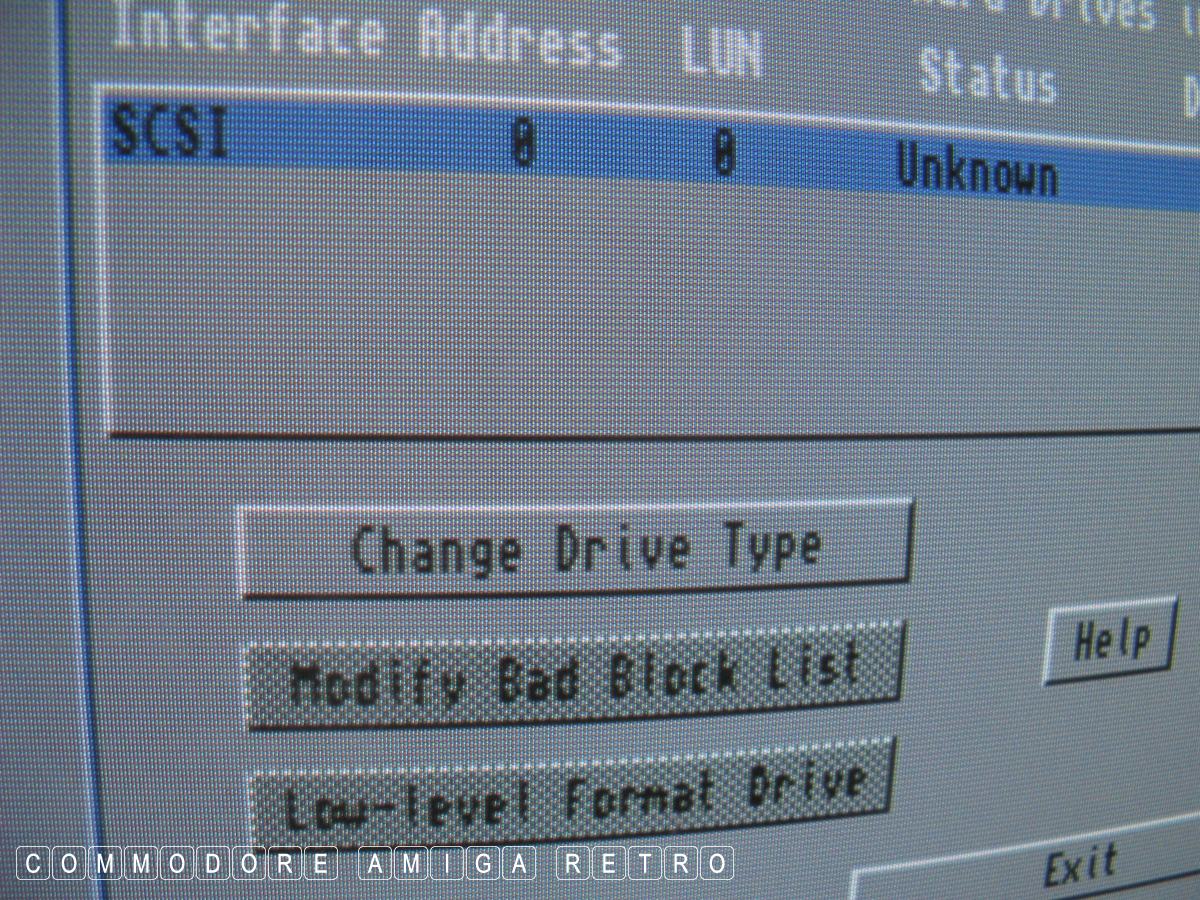
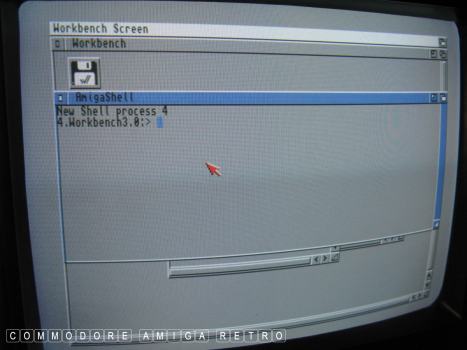
I fire up HDToolbox from the Install disk and the
signs are good as the drive is recognised albeit
unknown at this time.
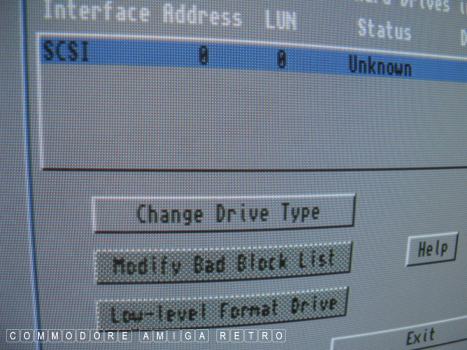
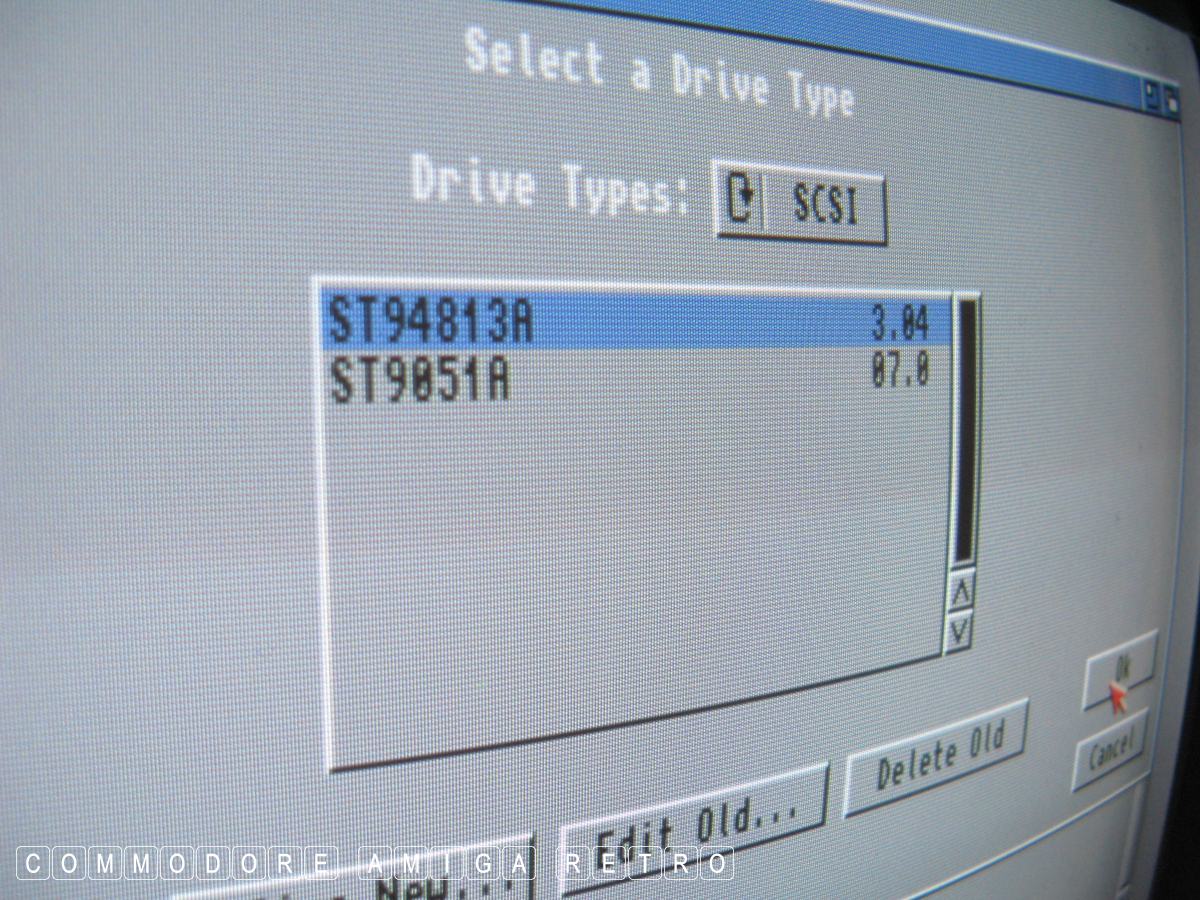
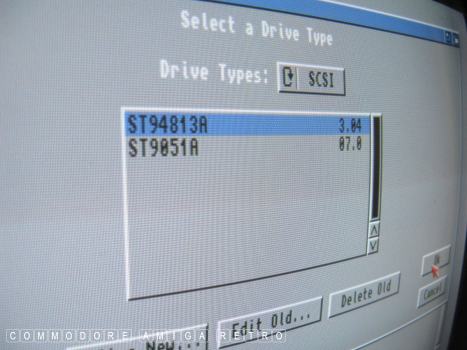
So I change the drive type.

And scan to read details off the drive.
There may be other drives listed, but that
is just data that has been saved to the floppy
from other computers. It isn't what is on
this computer. The only one that is relevant is
the one that is currently highlighted. So we go
with that one...
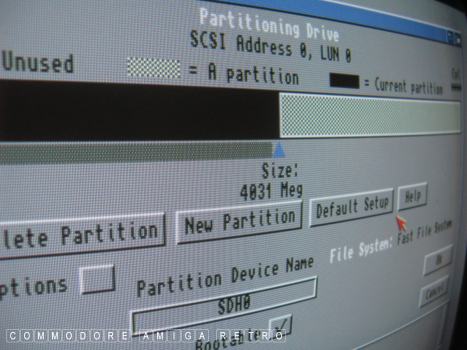
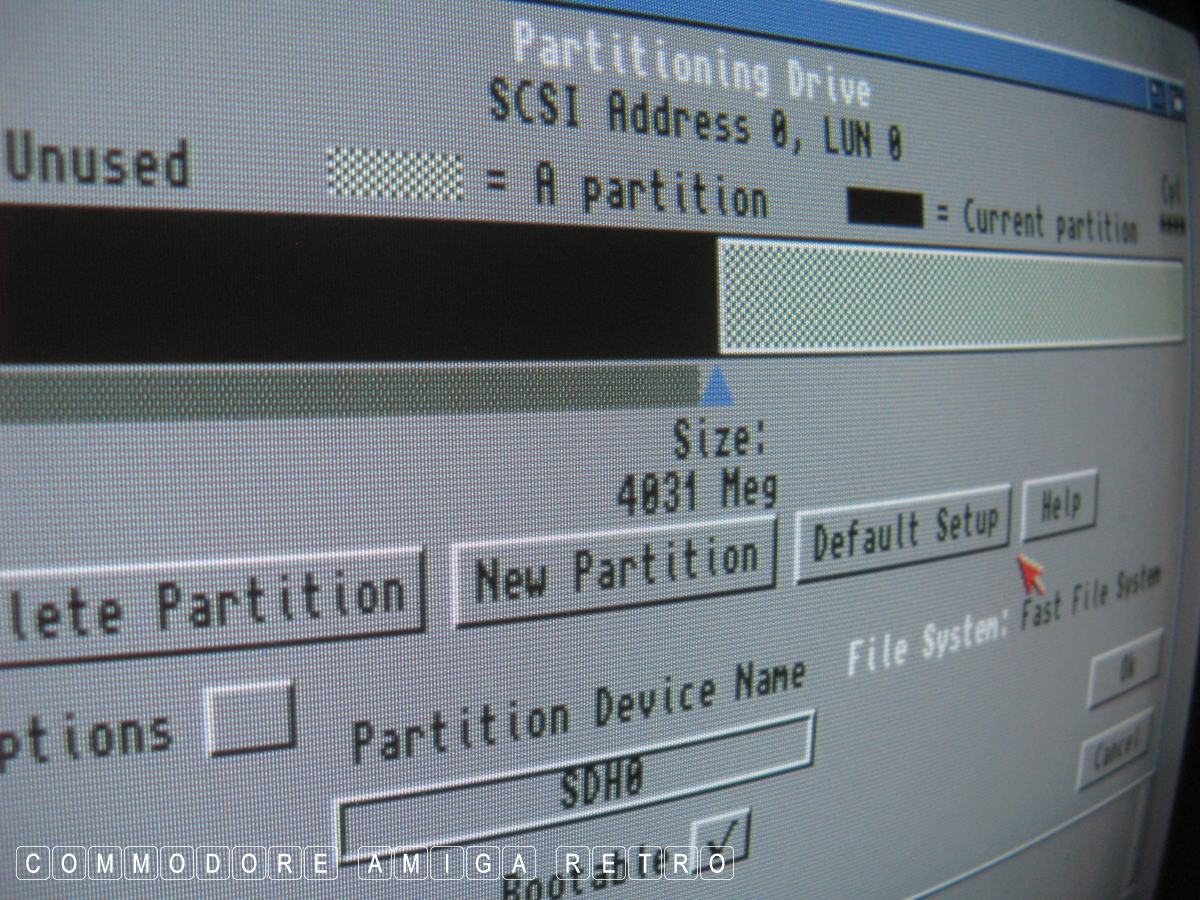
WB 3 can only see 4GB partitions tops and so
the reading on a large drive is bogus. Also this
is never guaranteed to work so I expect failure

So what I do to play safe-ish is create a small
1GB Workbench partition that is set to Bootable
and labelled DH0. If you remember that floppies
are DF0 and DF1 then its better to label the
partitions at DH0 and DH1 etc. The actual label
for the partition stays the same when they appear
on the Workbench. You can save and change the name
of the partition from the Workench though this never
changes the actual volume label so although your
volume says say Workbench or Work it probably is
actually DH0: [ Workbench ] and DH1: [ Work ]. It never
loses those partition labels as set here.
The interface actually tells you to 'Change-me' from
the label at the bottom
I never format here and never like ever low level format
that would be seriously bad. Seriously
The volumes of partitions will not reflect the actual
size of the drive. What I always do with dicky drives
is leave a space at the end and then delete it to leave
the hard drive open. This has worked for me and I really
cannot be responsible for other peoples data loss. Just
saying it's what I do. M'kay. I also never have a Volume
or partition over 2.1GB. Ever.
One last thing.. if a drive ever has a spin out
validating just leave it and go make a cuppa tea. Do not
switch the computer off. The Amiga is way more clever
than you at fixing these things. And when you have your
Workbench working .. copy the whole thing to your Work
partition so if you ever have a problem you can format the
Workbench and copy the old version back.
It's that easy on an Amiga.
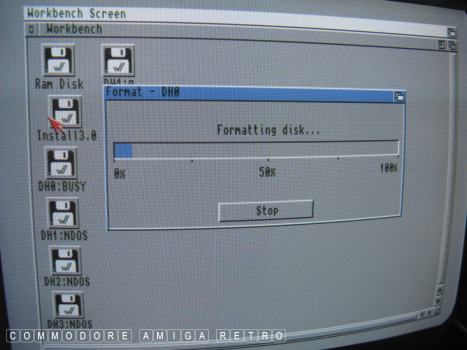
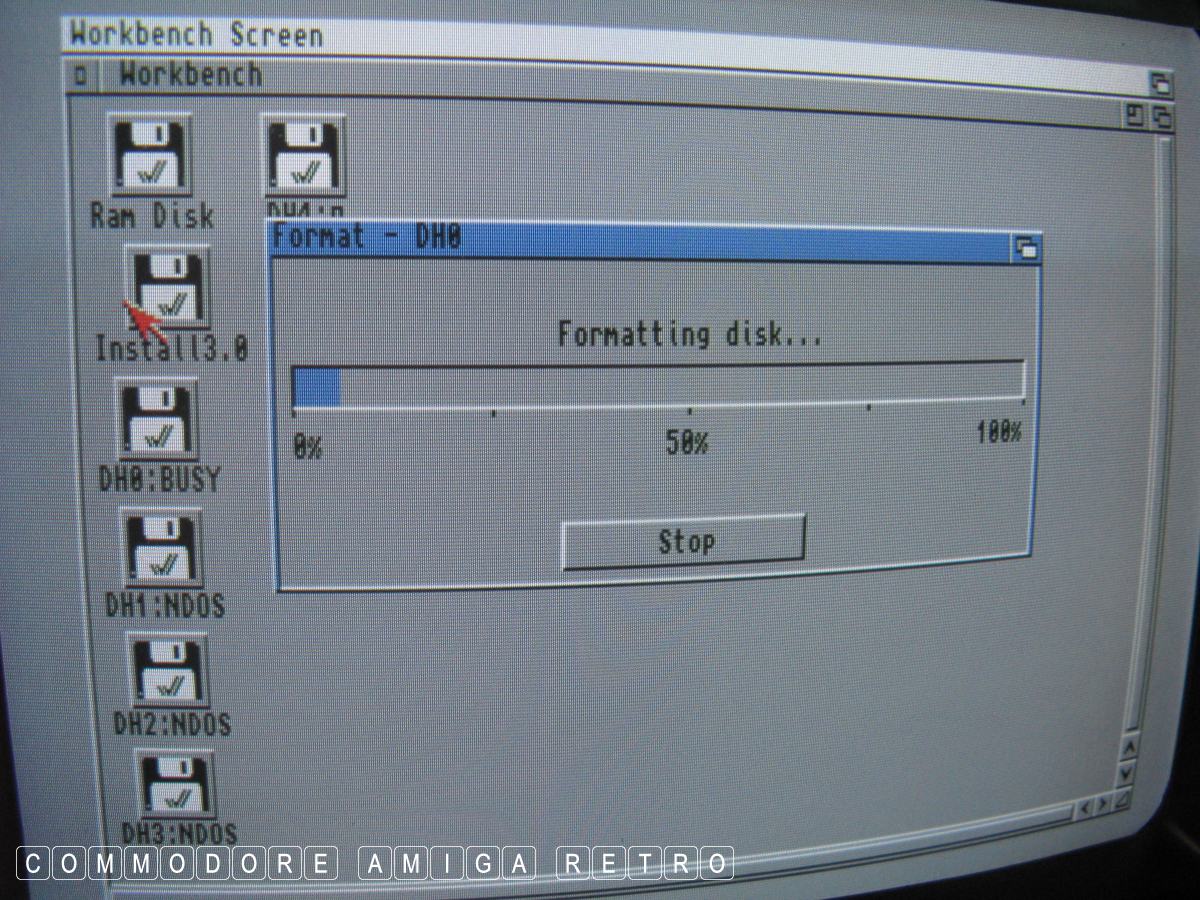
Having saved the data to disk simply reboot the
computer and then start formatting and labelling
each of the partitions. DH0 should always really
be named Workbench and convention generally is
that DH1 then is Work. The rest can be named anything.
I like to make my names distinct as my own. Only the
one partition DH0: or Workbench is 'Bootbable'.
Read on