Day Ten
Installing 3.1 ROMS
Don't forget that anything beyond OS3.0 on
an A1200 requires a hardware fix, in the form
of 3.1 ROM chips. That accounts for OS 3.1, 3.5 and 3.9
For details on the OS' available for the Amiga A1200
go visit Greg Donner on..
 Workbench Nostalgia
Specific site pages are:
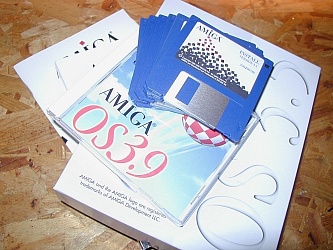
Amiga OS version 3.1
Amiga OS version 3.5
Amiga OS version 3.9
You would also be wise to download the Upgrades which
are on the large side so you could probably do with
a CD writer and access to a PC ( tush ! )
I didn’t bother with the upgrades for OS 3.5
Information on the upgrades can be found here
(Haage & Partner's website).
Now there are arguments that say you can upgrade straight
to OS3.9. I was advised against this and the suggestion
was that if you have 3.1 and 3.5 you should use them
I guess you could go from 3.1 to 3.9. either way you
need the ROM upgrade ( the two chips ) and the 3.1 OS
which comes on six floppy disks.
First step is to back up your data and settings
As a minimum I would copy your Workbench to another
partition, or better another hard-drive.
For OS3.5 and 3.9 you need the CD working so get
this working under OS3.0.
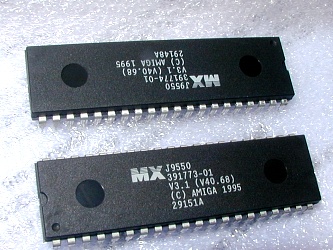
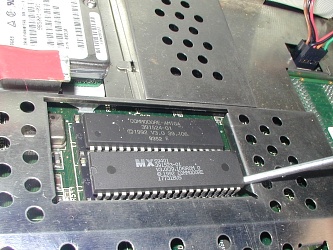
Carefully handle the chips and look at the numbers
It is critical that you get these the correct way
round. Note the V3.1 reference which distinguishes
these ROMS as the 3.1 Roms. There are two numbers
that vary.. 391773-01 and 391774-01. The lower numbered
ROM 391773-01 goes in slot reference U6A, the lower one
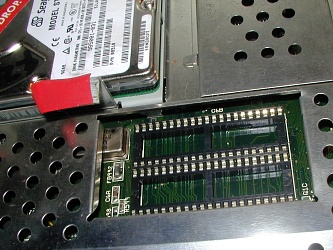
You now need to carefully prise the older ROMS from
the board. Do this very, carefully. You ease one end
at a time slowly lifting each end in increments. This
means lifting the ROM from each end a small bit at a time
Do not extend the screw driver under the chip and use the
motherboard as leverage. You will damage the motherboard
Better, use the ROM cradle and very delicately lift the
ROM. Once done place the older chips in a safe place
Your now asking how you can identify chip socket
number U6A, well its the lower one.
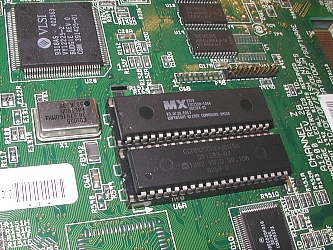
Its actually easier to fit the ROMS with the shielding
removed. Its not the removal that helped, its the
installing the new ROMS. You need to ensure that the
pins legs are all in place before pressing down, and
this can be difficult with the shielding in place
I used a magnifying glass with a light on to check
each pin was properly located in the socket below
The legs may all be slightly sprung out. Gently press
them evenly together to make sure they are all straight
and in line. When you feel comfortable that each and every
leg is sitting over the respective socket then press the
ROM into place
NOTE: There are one set of holes more than the chip
The holes on the left are to remain open and therefore
line the chip with the holes from the right edge of the
socket cradle.
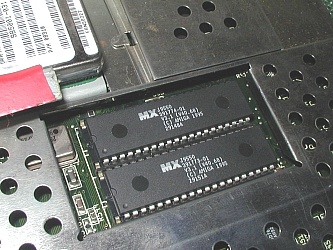
That’s it. Make sure the ROM’s are seated properly by
being firm but not too heavy handed.
Thats it for the hardware, now check that the computer
is still working prepare for the software installation
I copied my 3. Disks, just in case. The installation
is just a case of putting in the Install 3.1 disk
and going for it. The installation keeps all your
current software and settings for hardware. I lost
only the Workbench Menu for Tools Daemon and CD0 for
some reason ( though it left the info icon ) I simply
copied CD0 from my back-up and all was fine.
Next up was OS 3.5 which was installed from CD
This demanded a pre-install and then an install
over your current OS. Again went without a hitch
All disks and volumes visible, and software, CD and
modem working
I made an emergency boot disk which you create from
a menu off the CD.
Next up was 3.9 and this installed as easily as the
others. One problem was that it retained my previous
crap version of CacheCDFS. So I simply copied CacheDFS
and the prefernces from the CD, and hey presto ! I can
for the first time view the long file names on CD
I tweaked the screen to look half decent, and upped the
number of colours used by Workbench
One annoying thing about the later OS`s, is that the edges
of icons are transparent if grey and they look crap on
a black background.
Word of caution, do not attempt this without an accelerator
and a decent amount of RAM.
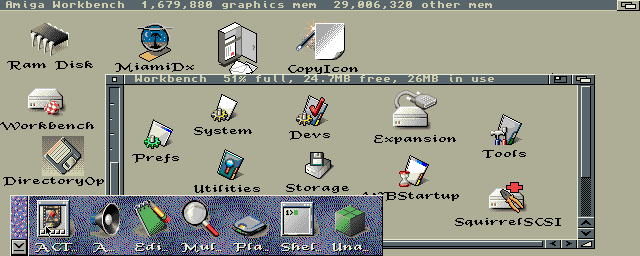
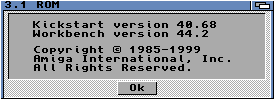
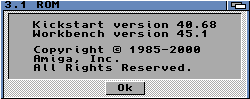
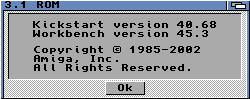
Screen grabs of the completed installation
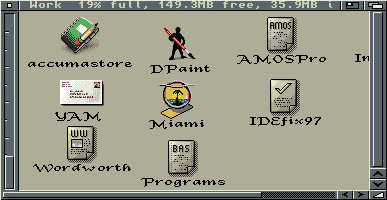
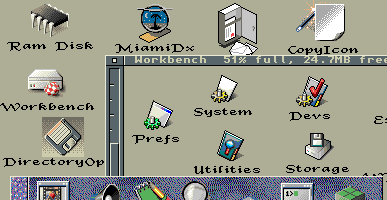
Click the second image for a larger view
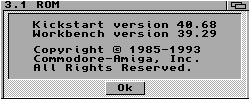
Those varying Workbench About screens for you
Indicating all the various Kickstarts
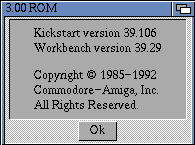
Amiga Workbench with 3.0 ROMS, 3.0 OS
Amiga Workbench with 3.1 ROMS, 3.0 OS

Amiga Workbench with 3.1 ROMS, 3.1 OS
Amiga Workbench with 3.1 ROMS, 3.5 OS
Amiga Workbench with 3.1 ROMS, 3.9 OS

Amiga Workbench with 3.1 ROMS, 3.9 OS and BoingBag1
Amiga Workbench with 3.1 ROMS, 3.9 OS and BoingBag2
And so what next... Thinks
Networking using Parnet to another Amiga
And then networking to a PC using AmiPC
And for those interested the spec on the Ł11
Amiga A1200 purchased from Ebay now stands at
Amiga A1200 with Blizzard 1230IV accelerator
Squirrel SCSI adaptor, 450mb internal IDE
2.1 GB external SCSI hard drive, SCSI Iomega Zip
US Robotics Modem, Power Computing CD-ROM drive
Power XL High density drive, DD second floppy drive
refurbished internal floppy drive, external speakers
Microvitec monitor, 3.1 ROMS and running OS 3.9
Not bad for an old computer worth Ł11